
How To Draw A House Plan: A Practical Guide For Engineers, Architects And Students
A house plan is the one document every trade on a project ends up relying on. Get it wrong at this stage, and the error doesn’t stay contained, it follows the project straight through electrical, plumbing, and structural design, usually surfacing at the worst possible time. Here’s what a house plan actually is, why it carries so much weight, and how to draw one properly from scratch.
What Is A House Plan?
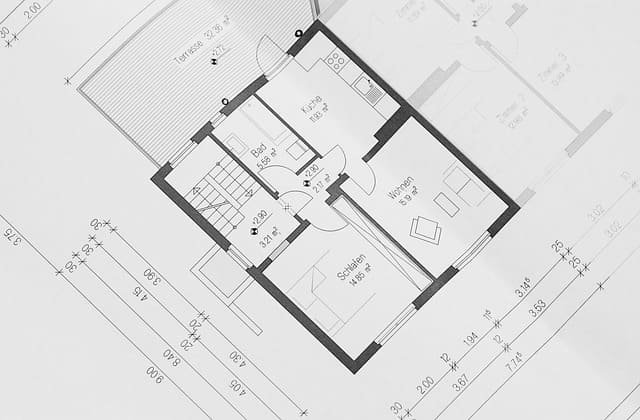
At its core, a house plan is a scaled, top-down drawing showing room layout, wall positions, door and window placements, dimensions, and north orientation. It’s not a rendering, and it’s definitely not a concept sketch someone knocked out to pitch an idea. It’s a working technical document that everything downstream, structural design, MEP layout, furniture placement, ends up referencing.
The floor plan you’ve seen on a property listing is really just a stripped-down version of this. Site drawings carry a lot more, wall thickness, fixture locations, load-bearing elements, all tied back to a north point and actual site measurements rather than rounded-off numbers for marketing purposes.
Why It Matters More Than It Looks
It’s easy to treat the plan as a formality you rush through to get to the “real” drawings. That’s a mistake, and here’s why.
Changes on paper cost nothing. Changes mid-construction cost a lot, sometimes enough to blow a budget entirely. A solid plan is where you catch layout issues, clearance problems, and utility conflicts while they’re still cheap to fix, rather than after a wall’s already up.
It’s also the base every other drawing pulls from. Sections, elevations, electrical runs, plumbing layouts, all of it traces back to the house plan. Get a room dimension wrong here and that mistake doesn’t stay isolated, it quietly works its way into every drawing that comes after.
There’s a resourcing angle too, one that’s easy to overlook until you’re the one doing the estimating. Once room areas are locked in, quantity surveyors run thumb-rule calculations off the plan for material and labour. And for clients or buyers, a plan communicates the actual feel of a space in a way photos just can’t manage. Rightmove’s own market data backs this up, floor plans move buyer decisions more than listing photos do, which says something about how much people actually rely on this document once it’s in front of them.
Steps To Draw A House Plan
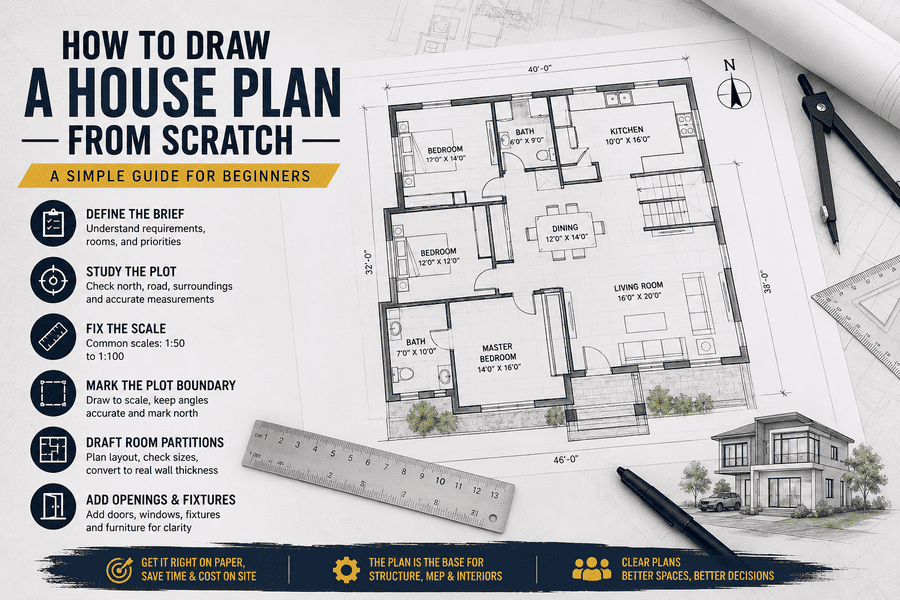
1. Define the brief
Lock down the requirements before anything touches paper, floors, bedroom count, kitchen and dining setup, bathrooms, garage, storage, balconies, basement if there is one. This comes from an actual conversation with the client or stakeholder, not from assumptions you’ve made on their behalf.
2. Study the plot
Confirm true north with a compass, don’t skip this. Identify the road-facing side, since the entrance placement usually follows it, and check what’s sitting next to the plot, since that affects where windows and balconies can go. Confirm the plot shape and get accurate measurements, by tape or by survey.
3. Fix the scale
Scale is simply the ratio between drawing size and actual size. At 1:100, one centimetre on paper equals one metre on site. Most house plans run somewhere between 1:50 and 1:100, and detailed room-level work usually drops to 1:20 or 1:50 for the extra precision.
4. Mark the plot boundary
Convert your plot measurements to scale and draw the boundary, keeping the angles true to the actual site rather than rounding them off for convenience. Mark north, and note the road or access point while you’re at it.
5. Draft the room partitions
Lay out single-line partitions based on the brief, check them against your requirement list, then convert to real wall thickness once the layout holds up. Keep an eye on upper-floor balconies here, they should never project past the plot boundary, even by a little.
6. Add openings and fixtures
Mark doors with swing direction, windows, ventilators, and fixed fittings like sinks and bathroom units. If furniture needs placing, do it now, it tends to expose clearance issues that don’t show up on an empty layout.
Standard Room Sizes
Treat these as a starting reference, not a rule carved in stone. Real sizing should flex with plot size and the client’s brief.
Bedrooms
| Room Type | Small (ft) | Medium (ft) | Large (ft) |
| Master Bedroom | 12 x 14 | 14 x 20 | 16 x 24 |
| Standard Bedroom | 10 x 10 | 12 x 12 | 14 x 16 |
Other Key Rooms
| Room Type | Small (ft) | Medium (ft) | Large (ft) |
| Living Room | 12 x 18 | 16 x 20 | 22 x 28 |
| Master Bathroom | 6 x 9 | 8 x 12 | 10 x 16 |
| Standard Bathroom | 6 x 9 | 7 x 10 | 8 x 12 |
| Kitchen | 5 x 10 | 10 x 16 | 12 x 20 |
3 Best Tools for Drawing a House Plan
Drawing a house plan by hand is possible, but software makes the work much easier when you need accurate measurements, quick changes, and a clear view of the final design. Engineers, architects, and students use different tools depending on whether they are working on 2D drawings, BIM models, or 3D concepts.
1. AutoCAD
AutoCAD is one of the most commonly used tools for creating detailed 2D house plans. You can draw walls, doors, windows, dimensions, furniture layouts, and other details with precise measurements. It is a practical choice when the main goal is to produce clean and accurate technical drawings.
2. Revit
Revit takes house planning a step further by using a BIM-based approach. Instead of drawing each view separately, you build a digital model of the house and use it to create floor plans, elevations, sections, schedules, and 3D views. This makes Revit useful when the project needs coordinated drawings and detailed building information.
3. Trimble SketchUp
Trimble SketchUp is a good option when you want to see how a house plan will look in three dimensions. Its simple modeling tools make it easy to build walls, rooms, roofs, and other parts of a house while developing the design. You can also use SketchUp with LayOut to turn the 3D model into 2D plans, elevations, sections, and other drawing details.
Final Note
A house plan is only as good as the site data and brief behind it. Rush the north check or skip proper requirement-gathering, and no amount of careful drafting afterward is going to save it. Nail those two things first, and honestly, the rest comes down to discipline more than skill, accurate scale, honest measurements, and a layout that actually reflects what the client asked for rather than what looked good on paper at 11pm.