
SketchUp for Architecture: A Practical Workflow From Concept to Construction
Most architectural SketchUp models start out simple. A few boxes to test massing, a rough site outline, maybe a couple of reference photos pinned to the wall behind you. Then the project moves forward and the model has to grow with it. Site context needs to go in. Walls need real thickness. Doors and windows have to behave properly. Someone asks for quantities. Suddenly the tidy little concept file from week one is a few hundred megabytes of tags, groups and components, and it’s not always obvious how it got that way.
This article walks through a practical, stage-by-stage workflow for using SketchUp on architectural projects, from the first massing study through to a model that’s actually ready to support construction. Along the way we’ll look at where the native toolset holds up well, where it starts to strain, and where a more specialised approach might save you real time. The goal isn’t to turn every project into a plugin showcase. It’s to give you a workflow that scales as the project does, without the model turning into a liability halfway through design development.
Why SketchUp Is Useful for Architectural Work
SketchUp earned its place in architecture offices for reasons that are still valid today. It’s fast for exploring form, forgiving enough for early-stage sketching, and precise enough to carry that sketch through to a usable design model without switching software.
In practice, architects lean on it for:
- Conceptual design and massing studies, where speed of iteration matters more than precision
- Exploring spatial relationships and form before committing to a direction
- Building site visualisations that clients can actually understand
- Developing interior and exterior detail as the design matures
- Producing presentation views and walkthroughs
- Coordinating geometry with other project information, from structural grids to services
- Pulling preliminary quantities before a project is detailed enough for full documentation
None of that requires anything beyond what ships in the box. Where things get more interesting is in how that workflow holds together as a project grows in scope and detail, which is really what the rest of this article is about.
The Architectural SketchUp Workflow at a Glance
Before diving into each stage, it helps to see the whole sequence laid out. A typical architectural project moves through something like this:
1. Define the project → 2. Build the site → 3. Create massing → 4. Model building elements → 5. Add openings → 6. Add details → 7. Optimise → 8. Extract information → 9. Prepare for construction
Not every project needs every stage in equal depth. A quick concept for a pitch might stop well before quantity takeoff. A documentation set headed for a builder needs all nine. Knowing where your project actually sits on that spectrum is half the battle, and it’s worth deciding early rather than figuring it out by accident three weeks in.
Step 1 — Define the Project Before Modeling
It’s tempting to open SketchUp and start drawing walls straight away. Five minutes of setup at the start usually saves hours later.
Establish the Project Scale and Units
Decide early whether you’re working in feet and inches or metric, and set your template accordingly. Model at real-world scale from the first line you draw. It sounds obvious, but a surprising number of downstream problems, from awkward component scaling to quantity errors, trace back to a units decision that got made carelessly on day one.
Organise the Model From the Beginning
Set up your tagging structure, grouping conventions and naming system before you have hundreds of objects to retrofit them onto. A model with consistent naming for walls, floors, furniture and site elements is dramatically easier to navigate, audit and hand off, especially once more than one person is working in it.
Decide What Level of Detail You Actually Need
This is worth sitting with for a moment, because it shapes everything that follows. Not every architectural model needs construction-level detail. A concept model exploring three massing options doesn’t need door hardware. A model heading to a construction meeting probably does need accurate wall build-ups. Matching detail to purpose keeps the file usable and keeps your time going where it actually matters.
Step 2 — Build the Site Context
There’s a reasonable argument for building the site before you touch the building at all. Context shapes decisions about orientation, height and setbacks, and it’s much easier to design against a site that’s already there than to bolt one on afterwards.
Start With the Site
At minimum, bring in property boundaries, existing terrain, adjoining roads, neighbouring buildings, significant trees and any other features that will genuinely influence the design. You don’t need to model the whole street. You need enough to make informed decisions and to communicate the project honestly.
Create Terrain and Topography
Even a simplified terrain surface gives you something to test the building against, particularly on sloped or irregular sites where floor levels and site cuts aren’t obvious until you’ve modelled the ground plane.
Add Only the Context You Need
This is where a lot of models quietly start to bloat. Every extra tree, every neighbouring building brought in at full detail, adds weight that the file carries for the rest of the project. It’s worth asking, for each piece of context you add, whether it’s actually informing a design decision or just filling space.
That balancing act between realistic context and model performance is a topic worth its own deeper look, and it’s one we’ll come back to later in this series.
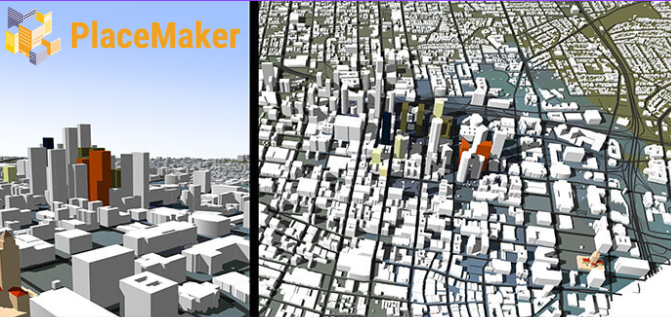
For architects who need to bring in real-world terrain, roads, existing buildings or aerial imagery rather than modelling site context by hand, extensions like PlaceMaker exist specifically to speed up that stage. It’s not a step every project needs, but on anything with a genuine site context requirement, it can turn a half-day task into a much shorter one.
Step 3 — Create the Building Massing
With the site in place, this is where the design actually starts to take shape.
Start With Simple Forms
Rough blocks, volumes, floor plates and roof masses are enough at this stage. Resist the urge to add detail before the fundamental form is settled. It’s far cheaper to reshape a box than to reshape a fully modelled building.
Explore the Building Form Before Adding Detail
Test proportion, height, setbacks and orientation against the site. This is also where relationships to neighbouring buildings, sightlines and solar access get evaluated, before there’s any real cost to changing direction.
Use Groups and Components to Protect Geometry
As soon as forms start to feel settled, group them. Raw, ungrouped geometry has a habit of merging with whatever else is nearby, and untangling that later is tedious in a way that’s entirely avoidable. This habit pays for itself many times over as the model grows.
Step 4 — Develop Walls, Floors, Roofs, and Repetitive Elements
This is where the model shifts from conceptual to architectural.
Model Walls at the Correct Thickness
Exterior walls, interior partitions and layered assemblies all need to reflect their real construction, not just a single flat plane. This matters for both visual accuracy and, later, for quantities.
Create Floors and Slabs
Floor plates, slabs and raised floors need their own attention, including where openings for stairs or shafts interrupt them.
Handle Repetitive Building Elements Efficiently
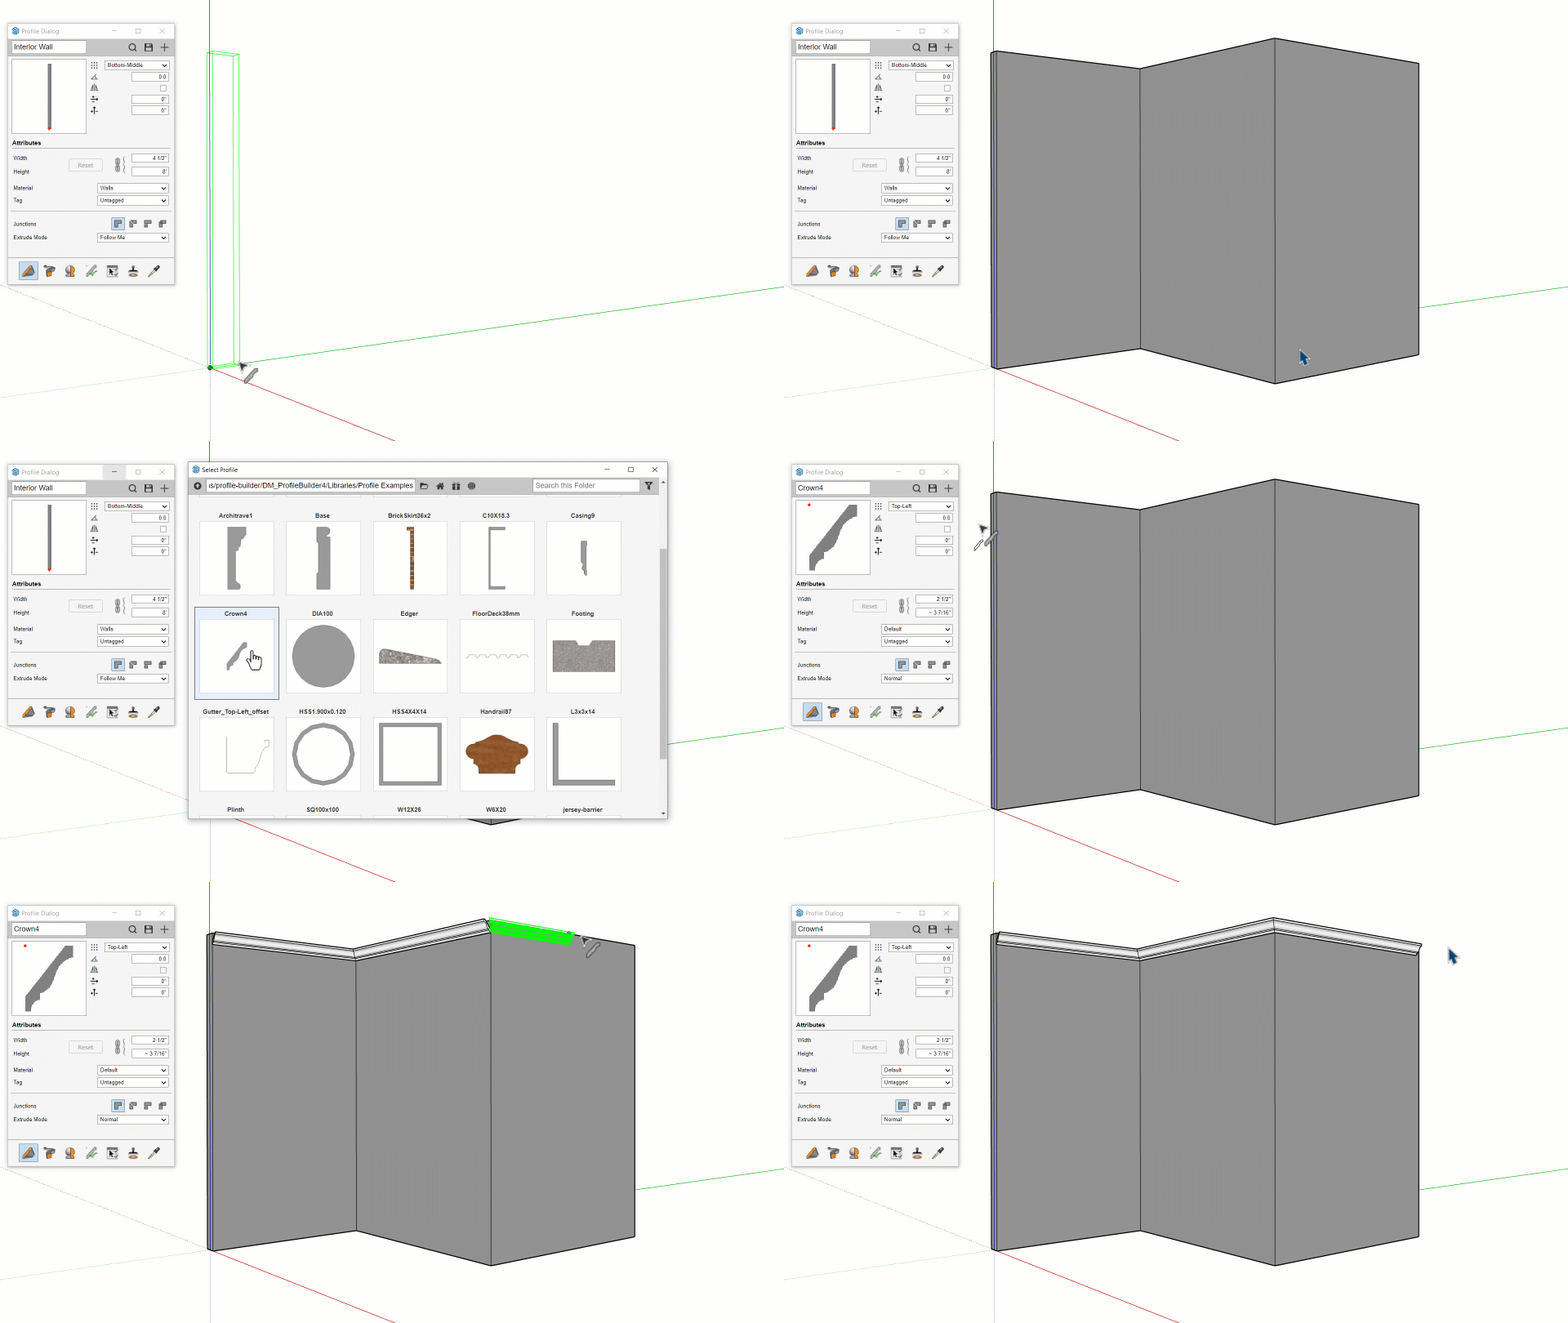
This is where a lot of architectural modelling time quietly disappears. Wall sections, railings, balustrades, fencing, trim, and repeated façade elements all tend to appear dozens or hundreds of times across a building. Model each one manually and you’re not just spending time up front, you’re setting yourself up for a painful revision cycle every time the design changes and every instance needs updating individually.
Native tools can get you through this on a small building. On anything with real repetition, path-based and parametric approaches start to make a lot more sense, since a single change to the profile updates every instance that follows it. This is exactly the kind of workflow that extensions such as Profile Builder are built around, letting an element follow a 2D or 3D path rather than being drawn instance by instance.
Step 5 — Add Doors, Windows, and Other Openings
Use Components for Repeated Openings
Doors and windows should almost always be components rather than one-off geometry, both for consistency and so a later change to a door style doesn’t mean redrawing every door in the building.
Understand How Cutting Components Work
SketchUp cuts openings through wall faces using cutting components, and this generally works well until the wall gets more complex. Thick walls, double-sided walls and walls built from multiple layers can all behave unpredictably when a window or door component doesn’t cut cleanly through every layer.
Why Openings Can Become Difficult in Detailed Models
The real friction shows up later, when a window gets resized or moved and the opening doesn’t update to match, or when a multi-layer wall needs the same opening cut through several separate layer groups. Fixing this manually, wall by wall, is one of those tasks that feels manageable on a small project and genuinely painful on a large one.
For projects with a lot of openings or multi-layer wall assemblies, an automated opening workflow can cut down significantly on the manual wall editing involved. That’s the specific problem an extension like Double-Cut is built to solve, keeping openings correctly cut as components move, resize or sit across multiple wall layers.
Step 6 — Add Architectural Details Without Overloading the Model
Add Detail Based on the Purpose of the Model
Door and window frames, cornices, baseboards, cabinet edges, façade articulation, furniture and fixtures all add believability, but they’re not all equally important at every stage. Add detail where it earns its place, not everywhere at once.
Don’t Model Every Detail at Full Complexity
There’s a constant trade-off between visual richness and file performance, and it’s worth being deliberate about where you spend that budget rather than applying the same level of polish everywhere by default.
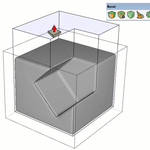
Use Bevels and Edge Treatment Where They Matter
Perfectly sharp, knife-edge geometry is one of the fastest ways to make an otherwise good model read as artificial. Real building edges, real furniture edges, almost none of them are perfectly sharp. A bit of edge treatment on the elements that are seen up close, like cabinetry, trim or furniture, goes a long way toward making renders and presentation views feel grounded. This is the kind of finishing touch that tools like Bevel are designed to handle without redrawing geometry manually.
Step 7 — Model Complex or Organic Forms When Required
Not every building is a composition of straight lines and right angles, and native SketchUp starts to show its limits once the geometry stops being boxy.
When Standard SketchUp Modeling Becomes Difficult
Curved façades, sculptural forms, organic roof shapes, freeform furniture and shaped landscape elements are all cases where pushing and pulling flat faces becomes a slow, frustrating way to get where you’re going.
Subdivision Modeling for Organic Architecture
Subdivision modelling, where a simple low-poly cage is smoothed into a more organic form, is a fundamentally different approach and one that native SketchUp doesn’t really offer out of the box. For projects that genuinely call for it, subdivision and sculpting extensions such as Artisan 2 fill that specific gap. It’s not something every project needs, but on a genuinely curved or sculptural design, it changes what’s realistically achievable in a reasonable timeframe.

Step 8 — Keep Your SketchUp Model Lightweight
This deserves its own section, because a slow model doesn’t just waste time, it actively discourages the kind of iteration good design depends on.
Why Architectural Models Become Heavy
High-poly furniture, trees, vehicles and other imported assets are usually the biggest culprits, often by a wide margin. Excessive textures, duplicate geometry and detail that was never actually needed add up too, but imported 3D content tends to be where the real weight comes from.
How to Find the Sources of Model Bloat
A quick audit habit helps here: check your largest components, purge unused content regularly, simplify or replace heavy assets, and use components rather than raw geometry wherever the same object repeats.
Simplify High-Polygon Assets
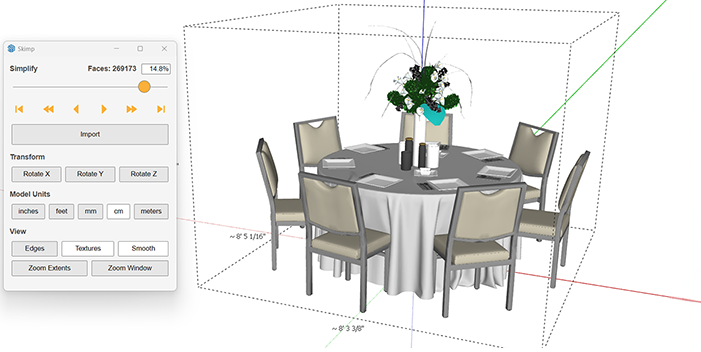
Sometimes the asset itself is the problem rather than the idea of including it at all. A tree or a piece of furniture downloaded from an online library can carry far more geometry than the model actually needs, and the fix isn’t necessarily deleting it, it’s reducing it. Polygon reduction tools such as Skimp are built for exactly this, importing and simplifying heavy assets while keeping materials and normals intact, so you get the visual result without carrying the full geometric cost.
Step 9 — Manage Repetitive Tasks More Efficiently
Common Repetitive Tasks in Architecture
Selecting similar objects, aligning elements, building arrays, replacing components across a model, scattering vegetation, moving objects onto surfaces, repeating elements along a path. None of these are hard individually. They’re just slow when you’re doing them by hand, over and over, across a large model.
Look for Automation Opportunities
A reasonable rule of thumb: if you’re performing the same operation dozens of times in a single project, it’s worth checking whether there’s a faster way to do it. Productivity-focused toolsets like SketchPlus exist to cover exactly this category of everyday task, from selection and alignment through to randomisation and component replacement. We’ll cover this category in more depth in a follow-up piece looking at the small tasks that quietly eat hours in architecture offices.
Step 10 — Handle Complex Solid Geometry
What Are Solid Operations?
Boolean operations, union, difference, intersection, trim and split, let you combine or cut solid geometry in ways that would be genuinely painful to build up manually face by face.
Why Boolean Operations Sometimes Fail
They also have a habit of failing in ways that aren’t obvious from the model alone. Non-solid geometry, tiny sliver faces and overlapping or intersecting objects are common causes, and troubleshooting them can eat far more time than the modelling task itself. For architects working through more demanding solid operations regularly, dedicated Boolean tools such as BoolTools are built to handle these cases more reliably, including the small, complex objects that tend to trip up native tools.
Step 11 — Use the Model for Quantity Takeoff
This is where the workflow shifts from architecture toward construction, and it’s arguably where the model starts earning its keep beyond design and presentation.
What Information Can a SketchUp Model Provide?
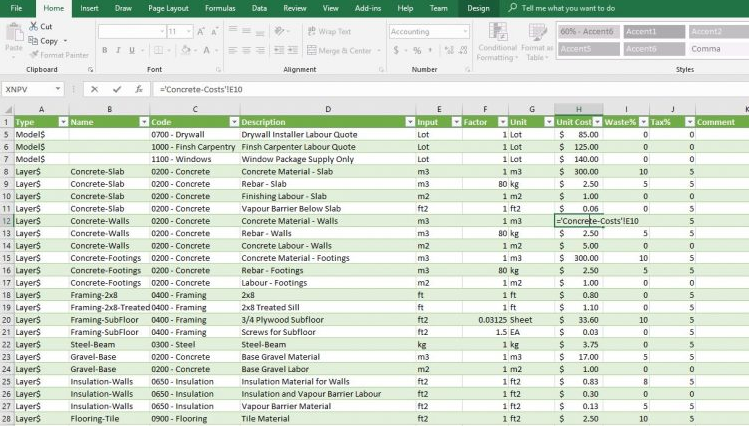
A well-built model can give you areas, lengths, volumes, counts and, with the right structure, material quantities, all pulled directly from the geometry rather than measured off drawings by hand.
Why Model-Based Quantities Can Reduce Rework
The real advantage shows up when the design changes, which it inevitably does. Update the model and the quantities can update with it, rather than someone going back through drawings to re-measure everything from scratch every time a wall moves.
Quantity Takeoff Is Only as Good as the Model
Worth being honest about here: this only works if the underlying model is accurate and consistently organised. Incorrect geometry produces incorrect quantities. Inconsistent naming and grouping makes the whole exercise unreliable. Any quantity output, whatever produced it, is worth spot-checking against known figures before it goes anywhere near a cost estimate.
For projects where this kind of model-driven takeoff is a genuine requirement rather than a nice-to-have, tools like Quantifier Pro are built specifically to calculate area, length, volume, weight and cost directly from the model, and to update those figures as the design changes rather than requiring a full manual re-measure each time.
Step 12 — Extending the Workflow to Structural Steel
When Architectural Models Need Structural Information
Some projects, particularly anything involving steel frames, columns, beams, connections or canopies, need a level of structural modelling detail that goes beyond typical architectural representation.
Architectural Modeling vs Steel Detailing
It’s worth being clear that these are genuinely different disciplines, not just different levels of the same task. An architectural model showing steel elements for coordination purposes is not the same thing as a steel detailing model built for fabrication.
For projects that do need dedicated structural steel modelling and detailing, purpose-built workflows like DECAsteel handle steel profiles, connections and detailing in a way general architectural tools aren’t designed for. This isn’t a step every architectural project needs, and it’s worth treating it as its own specialised stage rather than assuming it fits neatly into a general architectural workflow.
Step 13 — Review and Prepare the Model for Construction
Before a model goes anywhere near a construction team, it’s worth running it through a proper review.
Check Model Organisation
Confirm tags, groups, components, naming and scenes are all consistent and make sense to someone who isn’t you.
Check Geometry
Look for missing faces, unwanted intersections, non-solid geometry, duplicate objects and incorrectly cut openings.
Check Dimensions and Scale
Confirm the model still matches real-world dimensions, particularly if it’s been through several rounds of revision.
Check Quantities
If quantities have been extracted, verify a sample against known figures before they’re relied on for anything.
Create Appropriate Scenes and Views
Set up plans, elevations, sections, perspectives and any detail views the next stage of the project will actually need.
Common SketchUp Mistakes Architects Should Avoid
A few patterns show up again and again in architectural SketchUp models, regardless of the size or complexity of the project:
- Modelling without setting units first
- Drawing everything as raw, ungrouped geometry
- Ignoring model organisation until it’s too late to fix easily
- Over-detailing early stages before the design direction is settled
- Using excessively heavy 3D assets without checking their polygon count
- Manually repeating elements that should be parametric or component-based
- Ignoring how wall-opening behaviour actually works until it causes a problem
- Creating geometry that doesn’t need to exist
- Treating a presentation model as though it were a construction model
- Assuming a 3D model automatically produces accurate quantities without checking
Most of these aren’t dramatic mistakes. They’re small habits that compound over the life of a project until the model becomes harder to work with than it needs to be.
When Should You Use SketchUp Extensions?
This is worth addressing directly, because the honest answer is that not every project needs them.
Stick with native SketchUp tools when:
- The task is simple
- You only need to do it occasionally
- Manual modelling is genuinely faster than setting up an automated approach
Consider an extension when:
- The task is repetitive across the project
- The geometry is complex enough that native tools are unreliable
- The model is large enough that performance is becoming a problem
- The same operation needs to be repeated frequently
- You need specific information out of the model that native tools don’t provide
| Workflow problem | Possible tool |
| Repetitive profiles and assemblies | Profile Builder |
| Wall openings | Double-Cut |
| Site context | PlaceMaker |
| Organic forms | Artisan 2 |
| Edge treatment | Bevel |
| Heavy models | Skimp |
| Productivity tasks | SketchPlus |
| Solid operations | BoolTools |
| Quantity takeoff | Quantifier Pro |
| Steel modelling | DECAsteel |
A Practical SketchUp Workflow for a Typical Building
To make this concrete, here’s roughly how the sequence plays out for a straightforward two-storey residential project:
Import the site, establish units, create terrain, build floor plates, model the walls, add doors and windows, create the stairs, add the roof, add railings, layer in architectural details, place furniture, optimise any heavy imported assets, check the geometry, calculate quantities, and finally prepare the views needed for the next stage of the project.
None of these steps are individually complicated. The value is in doing them in a sensible order and not skipping the organisational habits that make the later steps easier.
Final SketchUp Architecture Workflow Checklist
A quick reference for keeping a project on track:
- Set units
- Organise the model
- Establish the site
- Create massing
- Develop walls, floors and roof
- Add openings
- Add repetitive elements
- Add necessary details
- Optimise geometry
- Check solids
- Extract quantities
- Review the model
- Prepare drawings and views
Final Thoughts
A good architectural SketchUp model isn’t necessarily the most detailed one. It’s the model that carries the right information for its stage, stays manageable as the project develops, and can actually support whatever comes next, whether that’s a client presentation, a documentation set, or a construction meeting.
Getting there is mostly a matter of good habits: setting up the model properly from the start, matching detail to purpose, and keeping an eye on performance before it becomes a problem rather than after. Where a particular stage of that process turns genuinely repetitive or technically demanding, that’s usually the point where a more specialised tool is worth considering, whether that’s for repetitive elements, site context, heavy assets, or model-based quantities. It’s rarely worth reaching for one before the workflow actually calls for it.